How to Turn a Photo into a Cross-Stitch Pattern
Turn a photo into a cross-stitch chart: pick a clear photo, set the width in stitches, reduce the colors, simplify the background and match floss yourself.
https://needlenook.app/learn/how-to-turn-a-photo-into-a-cross-stitch-pattern
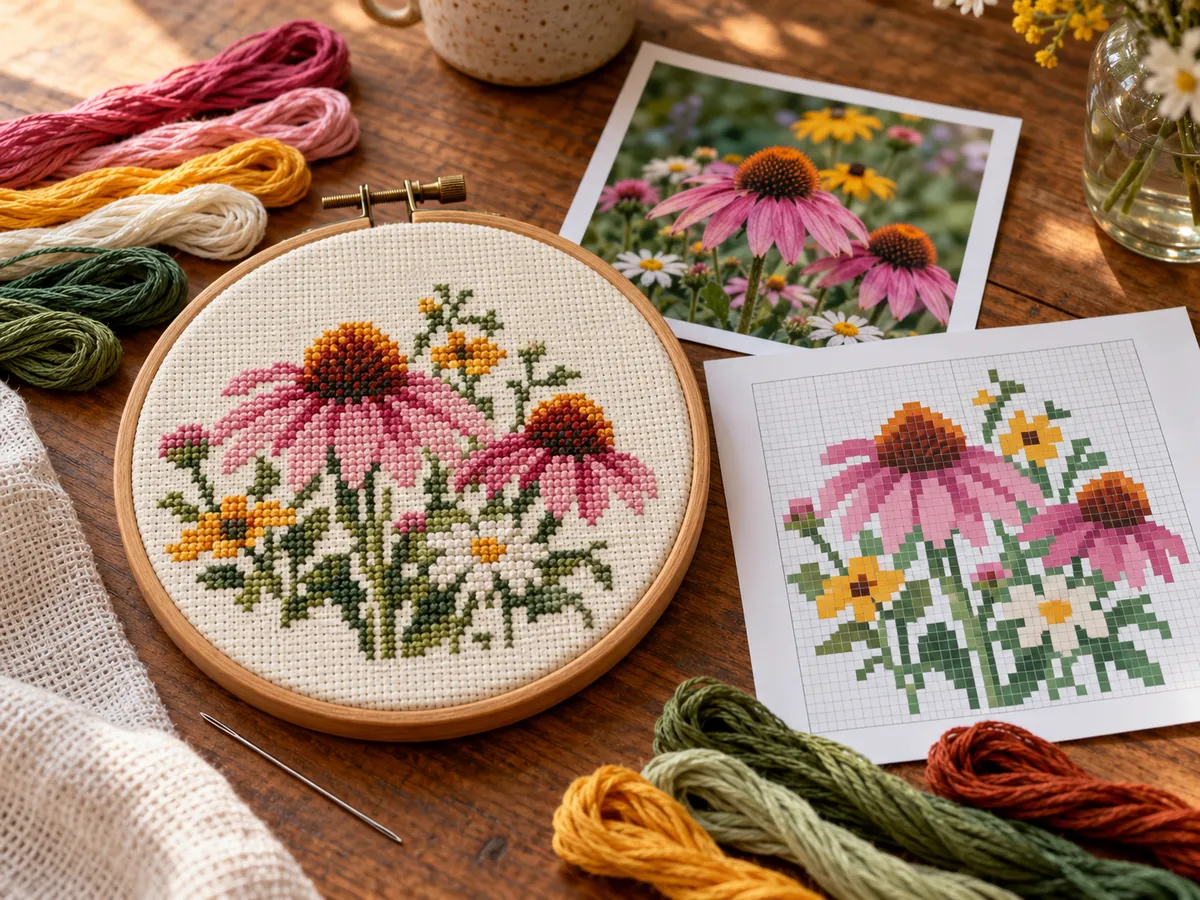
Choose a clear photo with a plain background, decide how many stitches wide the design should be, reduce the image to a small set of colors, and tidy the chart before you match thread. Width sets the size: a photo charted 120 stitches wide finishes at 8.57" (21.8 cm) on 14-count Aida.
The steps below go in that order, and each one explains what the color settings actually do to the chart.
Key points
- Start with a sharp photo, good contrast and a plain background.
- Width in stitches sets the size: finished inches = stitches ÷ fabric count.
- Fewer colors give a bolder, simpler chart; more colors keep shading but add work.
- Dithering mixes colors in a speckled pattern; it is off by default and is best for smooth gradients.
- Match thread to the color swatches yourself under good light; this site does not give branded floss numbers.
Step 1: Choose a photo that will chart well
A good chart starts with a good photo. DMC's advice for photo charts is to choose a sharp image with sufficient color contrast and a plain background, such as a wall or the sky, and to avoid busy backgrounds, reflections and text. Photos taken from too far away lose the detail of the subject.
Crop tightly around the subject before charting. Every stitch spent on empty background is a stitch that cannot show the face, pet or building you care about.
- Sharp focus on the subject.
- Clear contrast between subject and background.
- Plain, uncluttered background.
- Subject fills most of the frame after cropping.
Step 2: Set the width in stitches
Width in stitches is the main size control. More stitches show more detail but make a larger piece and take longer to stitch. The height follows from the photo's shape: a 4:3 landscape photo charted 120 stitches wide is 90 stitches high.
On 14-count Aida, 120 x 90 stitches finish at 8.57" x 6.43" (21.8 x 16.3 cm). Add 3" on every side, and the fabric should be at least 14.57" x 12.43" (37.0 x 31.6 cm). On 18-count the same chart finishes at 6.67" x 5.00" (16.9 x 12.7 cm). DMC notes that a higher count makes smaller stitches, so choose the count with the finished size in mind.
Step 3: Reduce the colors
A photo can contain thousands of colors, but a chart needs a short list of threads. Reducing an image to a small palette is called color quantization. The cross-stitch pattern maker on this site lets you choose from 2 to 40 colors and two methods: median cut, which repeatedly splits the image's colors into groups of similar size, and k-means, which refines a palette by grouping each pixel with its nearest color. Wikipedia describes median cut as the most popular quantization method and notes that efficient k-means implementations perform well as color quantizers.
Try a few color counts and compare. Low counts give a bold, graphic look; DMC notes that fewer colors can look more contemporary. Higher counts keep more shading in faces and skies but add more thread changes.
Step 4: Decide on dithering
Dithering scatters pixels of two colors next to each other so the eye blends them into an in-between shade. It can smooth out the banding that appears in skies or skin when colors are reduced. On fabric, though, it creates many single, isolated stitches, which are slow to work. Dithering is off by default; turn it on when a smooth gradient matters more than stitching speed.
Step 5: Simplify the background and clean up
Look at the chart at full size and remove noise. Merge scattered single stitches into their neighbors, replace a busy background with one or two plain colors, or leave the background unstitched so the fabric shows through. Each of these changes reduces thread changes without hurting the subject.
- Merge stray single stitches into the surrounding color.
- Replace a noisy background with one solid color or plain fabric.
- Combine two very similar colors into one.
- Check the eyes and edges of the subject at full size.
Step 6: Match the thread yourself
The chart gives each color as an on-screen swatch. Take the printed chart, or a screen at a steady brightness, to your thread and compare in daylight or a daylight lamp. Screens and printers show color differently, so judge by the thread, not the screen. Write your chosen thread next to each swatch in the key before you start.
This site does not provide branded floss matches or conversion tables, so this step is always yours. If two swatches match the same thread, merge them in the chart to keep the key short.
Common questions
- How many colors should a photo cross-stitch have?
- There is no fixed number. Try several settings between 2 and 40 and compare. Fewer colors give a bolder, quicker piece; more colors keep shading but add thread changes.
- What size should I make my photo cross-stitch?
- Choose the width in stitches, then divide by the fabric count. 120 stitches is 8.57" on 14-count and 6.67" on 18-count. Add 3" of fabric on every side.
- Should I turn on dithering?
- Only for smooth gradients such as skies or skin. Dithering blends colors visually but creates many isolated stitches, which are slower to work. It is off by default.
- Does the pattern maker tell me which floss numbers to buy?
- No. It shows a color swatch for each symbol. Match those swatches to your own thread under good light and note your choices in the chart key.
About this page
Written and reviewed by Tessa, Editor, Needle Nook. Last reviewed . General craft guidance; check your own gauge and measurements before cutting or stitching.
Facts on this page follow these references: