How to Finish a Cross-Stitch in a Hoop
Hoop the stitching tight, trim to about 1", gather the edge with a running stitch and sew on a felt circle. Glue and no-glue methods compared.
https://needlenook.app/learn/how-to-finish-a-cross-stitch-in-a-hoop
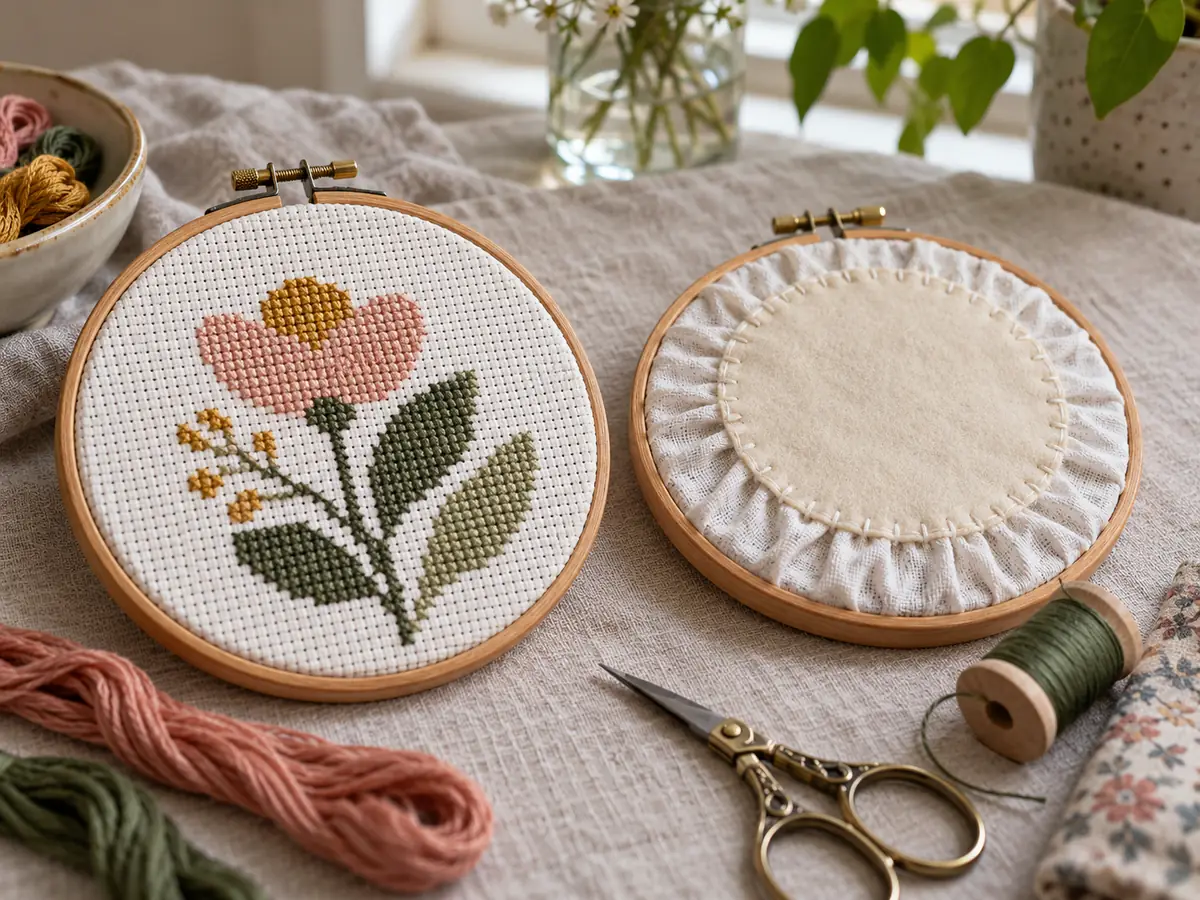
Center the finished stitching in the hoop, tighten the screw, trim the spare fabric to about 1" (2.5 cm) all round, gather that edge onto the back with a running stitch, and cover the back with a felt circle held by small whip stitches. That is the no-glue method Crewel Ghoul teaches; it looks tidy from the back and comes apart later if you want to reframe.
The guide first sizes the hoop from the stitch count, so the design sits inside the ring with fabric to spare, then walks through the felt finish, sets it against the fabric-and-glue version, and explains why a keepsake piece is better stitched than glued.
Key points
- Design width in inches = stitches ÷ fabric count. Choose a hoop whose inner ring clears the design on every side.
- Tighten the hoop with the design centered and both layers smooth before trimming anything.
- Trim the extra fabric to about 1" around the hoop, then gather it onto the back with a running stitch.
- A felt circle cut slightly smaller than the outer ring, whip stitched on, hides the back without glue.
- Glue is permanent; conservators keep adhesive off a textile they want to keep and stitch it instead.
Pick the hoop size from your stitch count
The finished design size in inches is the stitch count divided by the fabric count. A design 70 stitches wide on 14-count Aida is 70 ÷ 14 = 5" (12.7 cm) wide. On 18-count, the same chart is 70 ÷ 18 = 3.9" (9.9 cm). Work out both width and height, then take the larger one.
In a hoop finish the inner ring frames the design, so choose a hoop that leaves an even border of plain fabric around the stitching. For the 5" design above, a 6" or 7" hoop leaves about 1/2" to 1" on each side. The cross-stitch pattern maker on this site shows the finished size in inches and centimetres for each fabric count, so you can choose the hoop before you stitch.
- Design inches = stitches ÷ fabric count.
- Hoop: larger than the design on both width and height.
- Fabric: cut it larger than the hoop so you can grip it while tightening.
Step 1: hoop it straight and tight
Loosen the screw, separate the rings, and lay the stitching over the inner ring. Press the outer ring down over it, then center the design, smooth out wrinkles and tighten the screw a little at a time while easing the fabric taut. Crewel Ghoul does this with both layers in place when a fabric backing is used, so they are tightened together.
Put the screw where you want the top of the piece to be, because it usually becomes the hanging point. Check that the rows of stitches run straight across the hoop before trimming, since nothing can be adjusted after the edge is cut.
Step 2: trim and gather the back
Trim the extra fabric to about 1" around the hoop. Cut a long piece of floss; Crewel Ghoul suggests laying it around the hoop to judge the length. Knot one end and work a running stitch along the edge of the extra fabric all the way round.
Pull the thread so the fabric gathers in onto the back of the hoop, draw it snug so the gathers hold, and knot the ends. The front stays tight because the hoop itself holds the stitching; the running stitch only tidies the edge.
Step 3: sew a felt circle over the back
Trace around the outside of the hoop onto felt and cut just inside the line, so the circle covers the gathered fabric but is slightly smaller than the outer ring. Trim more if it does not sit flat.
Knot a long thread and take the first stitch through the gathered fabric only, so the knot is hidden. Then stitch through the fabric and the felt with small whip stitches all the way round, and finish with a few small knots before trimming the tail. No glue is used, so the felt can be unpicked later if the piece needs to come out of the hoop.
Felt, fabric and glue compared
Crewel Ghoul also shows a fabric backing finish: a backing fabric goes behind the stitching in the hoop, the extra is trimmed with pinking shears leaving about 1", the backing is trimmed flush, and the edge is pressed into hot glue run around the inner ring. It is quick and neat, but the glue holds the fabric to the ring for good.
| Method | Holds the edge with | Can it be undone? | Best for |
|---|---|---|---|
| Running stitch only | Gathering thread | Yes | A quick finish where the back is not seen |
| Running stitch + felt | Thread and whip stitches | Yes, by unpicking | Gifts and keepsakes |
| Fabric backing + hot glue | Glue on the inner ring | Not cleanly | Pieces you will never re-hoop or wash |
Why a keepsake should be stitched, not glued
Museum conservators avoid putting adhesive on a textile they want to keep. In its guide to mounting small flat textiles, the Canadian Conservation Institute stitches the textile to a fabric-covered support with small stitches, places pins between threads instead of through them, and keeps glue and tape on the support, never directly under the textile.
A hoop finish is not a museum mount, but the same idea applies. If a piece matters to you, choose the felt method so the stitching can be taken out, washed or reframed later without cutting it free from glue.
What to check before you hang it
Look at the front in good light for slack spots and tighten the screw a little if needed. Check that the felt sits inside the outer ring so it does not show from the front. Keep the screw at the top for hanging, and write the fabric count and date on the felt with a fabric pen if you want a record for later.
Common questions
- What size hoop do I need for my cross-stitch?
- Divide the stitch width and height by the fabric count to get the design size in inches, then choose a hoop larger than the bigger number. A 70-stitch-wide design on 14-count is 5" wide, so a 6" or 7" hoop leaves a border of plain fabric.
- Do I need glue to finish a hoop?
- No. A running stitch gathers the extra fabric onto the back, and a felt circle sewn on with whip stitches covers it. Crewel Ghoul shows this method as the option for anyone who does not want to use hot glue.
- How much fabric should I leave around the hoop?
- Crewel Ghoul trims the extra fabric to about 1" around the hoop before gathering it. Cut the fabric larger than that at the start so you can grip it while tightening.
- Can I take the stitching out of the hoop later?
- Yes, if it was finished with thread and felt: unpick the whip stitches and the running stitch and loosen the screw. A glued finish holds the fabric to the ring and cannot be removed cleanly.
About this page
Written and reviewed by Tessa, Editor, Needle Nook. Last reviewed . General craft guidance; check your own gauge and measurements before cutting or stitching.
Facts on this page follow these references:
- How to Back an Embroidery Hoop with Felt ↗Crewel Ghoul
- How to Finish Cross Stitch in a Hoop ↗Crewel Ghoul
- Mounting Small, Light, Flat Textiles (CCI Notes 13/6) ↗Canadian Conservation Institute, Government of Canada