Half-Square Triangle Math: Cut Sizes Chart
Cut size for half-square triangles made two at a time: finished size plus 7/8", or plus 1" to trim. Includes a chart, flying geese sizes and yardage.
https://needlenook.app/learn/half-square-triangle-math
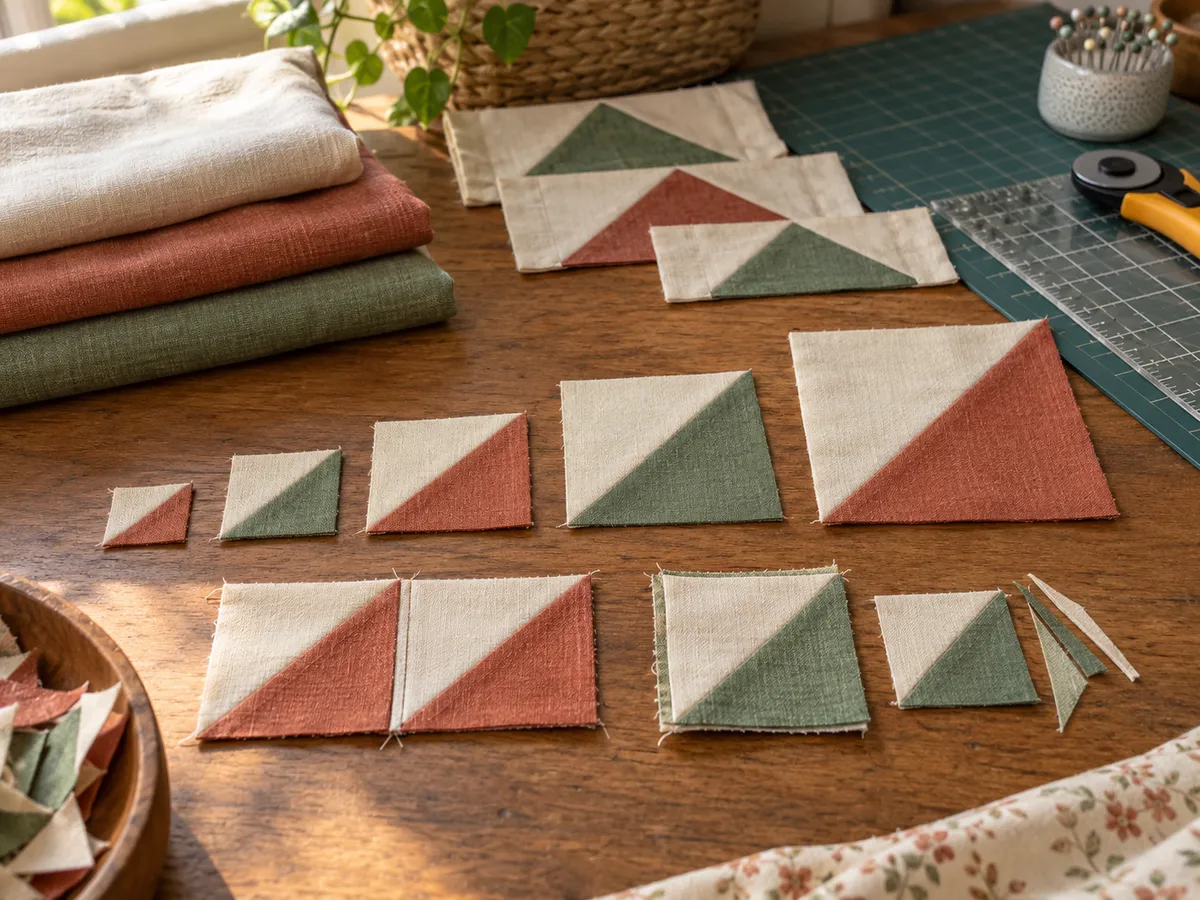
Cut two squares at the finished half-square triangle (HST) size plus 7/8", sew 1/4" on each side of the diagonal, then cut them apart. A 3" finished HST therefore starts as two 3 7/8" (9.8 cm) squares. The usual mistake is adding only the plain-square allowance, which leaves every triangle short.
The sections below explain where the 7/8" comes from, give a cut-size chart, show the plus-1" trim-down option, and add the matching numbers for no-waste flying geese, in the order you sew them.
Key points
- Two-at-a-time HSTs: cut two squares at finished size + 7/8"; each pair of squares makes 2 HSTs.
- For a trim-down margin, cut at finished size + 1" and trim each unit to finished size + 1/2".
- The most common mistake is adding only 1/2" as for plain squares, which leaves the HST too small.
- No-waste flying geese: one large square at goose width + 1 1/4" and four small squares at goose height + 7/8" make 4 geese.
- An unfinished HST should measure its finished size + 1/2" before it goes into a block.
The common mistake first
Plain squares are cut 1/2" larger than their finished size, so it is tempting to cut HST squares the same way. That leaves every triangle short, because a half-square triangle also has a seam on its diagonal. The diagonal seam needs its own allowance, and that is what pushes the addition from 1/2" up to 7/8".
Where the 7/8" comes from
A finished HST has two straight sides and one diagonal seam. The two straight sides need 1/4" each, which accounts for 1/2". The diagonal seam is also 1/4" wide, but it is measured at right angles to the diagonal. Measured along the edge of the square, that 1/4" becomes 1/4" × 1.414, or about 0.354". Together, 0.5 + 0.354 = 0.854", which quilters round up to 7/8" (0.875").
Utah State University Extension gives the same rule: add 7/8" to the finished square size, so two 3" finished HSTs come from two 3 7/8" squares, and the unfinished unit should measure 3 1/2". Because 7/8" is only a hair over the exact figure, the method depends on an accurate 1/4" seam.
Sewing order: two at a time
This method makes two identical HSTs from one light square and one dark square of the same cut size.
- Cut one light and one dark square at finished size + 7/8".
- Draw a diagonal line corner to corner on the wrong side of the light square.
- Place the squares right sides together with the edges aligned.
- Sew 1/4" from the drawn line on both sides.
- Cut on the drawn line to separate two units.
- Press, then trim the small dog ears at the corners.
- Check that each unit measures finished size + 1/2".
Cut-size chart for HSTs
Use the middle column for the exact method and the right-hand columns if you prefer to cut oversize and trim. Every row is simple addition: finished + 7/8", finished + 1", and finished + 1/2" for the trim-to size.
| Finished HST | Cut squares (+7/8") | Oversize cut (+1") | Trim unit to |
|---|---|---|---|
| 1" | 1 7/8" | 2" | 1 1/2" |
| 1 1/2" | 2 3/8" | 2 1/2" | 2" |
| 2" | 2 7/8" | 3" | 2 1/2" |
| 2 1/2" | 3 3/8" | 3 1/2" | 3" |
| 3" | 3 7/8" | 4" | 3 1/2" |
| 3 1/2" | 4 3/8" | 4 1/2" | 4" |
| 4" | 4 7/8" | 5" | 4 1/2" |
| 4 1/2" | 5 3/8" | 5 1/2" | 5" |
| 5" | 5 7/8" | 6" | 5 1/2" |
| 6" | 6 7/8" | 7" | 6 1/2" |
The plus-1" option: cut big, trim down
Many quilters cut HST squares at finished size + 1" instead of + 7/8". The extra 1/8" gives room for a slightly wandering seam or a stretched bias edge. After pressing, place the 45-degree line of a square ruler on the seam and trim the unit to finished size + 1/2". The trimming takes a few extra minutes but gives HSTs that match exactly, which matters most in blocks with many points.
No-waste flying geese, four at a time
A flying geese unit is twice as wide as it is tall. The no-waste method uses one large square for the goose and four small squares for the sky. Cut the large square at the finished goose width + 1 1/4" and the four small squares at the finished goose height + 7/8". WeAllSew (BERNINA) shows this with a 2" x 4" goose: a 5 1/4" large square and four 2 7/8" small squares make four geese that are squared up to 2 1/2" x 4 1/2".
| Finished goose (h × w) | Large square (w + 1 1/4") | Small squares (h + 7/8") | Unfinished unit |
|---|---|---|---|
| 1" × 2" | 3 1/4" | 1 7/8" | 1 1/2" × 2 1/2" |
| 1 1/2" × 3" | 4 1/4" | 2 3/8" | 2" × 3 1/2" |
| 2" × 4" | 5 1/4" | 2 7/8" | 2 1/2" × 4 1/2" |
| 3" × 6" | 7 1/4" | 3 7/8" | 3 1/2" × 6 1/2" |
Yardage for a batch of HSTs
Each pair of squares gives two HSTs, so you need half as many squares of each fabric as HSTs. For 48 HSTs that finish at 3", cut 24 light and 24 dark squares at 3 7/8". One 40" strip that is 3 7/8" deep gives 10 squares (40 ÷ 3.875 = 10.3, rounded down), so each fabric needs 24 ÷ 10 = 2.4, rounded up to 3 strips. Three strips use 3 × 3.875 = 11.625" (29.5 cm), which rounds up to 3/8 yard (13.5") of each fabric.
The quilt pattern generator on this site uses these same rules for HST and flying geese units and adds the results to the fabric totals for the whole layout.
Common questions
- Why are my half-square triangles coming out too small?
- The usual causes are cutting squares at finished size + 1/2" instead of + 7/8", or sewing a seam wider than 1/4". Cut at + 1" and trim to finished size + 1/2" if your seams vary.
- Is 7/8 inch exact?
- Not quite. The exact addition is about 0.854", and 7/8" is 0.875". The small surplus is close enough that units usually need only a light trim of the dog ears.
- How many HSTs does one pair of squares make with this method?
- Two. One light square and one dark square sewn on both sides of the diagonal and cut apart give two identical half-square triangles.
- Do flying geese use the same 7/8 inch rule?
- The small squares do: finished goose height + 7/8". The large square uses finished goose width + 1 1/4", and one large square with four small squares makes four geese.
About this page
Written and reviewed by Nora, Editor, Needle Nook. Last reviewed . General craft guidance; check your own gauge and measurements before cutting or stitching.
Facts on this page follow these references:
- Half Square Triangles, Broken Dishes Block, Pinwheel Block ↗Utah State University Extension
- No-Waste Flying Geese ↗WeAllSew (BERNINA of America)
- What is a Seam Allowance? ↗The Quilt Show